Wood Floor Repair - How To
Wood floor repair: Hardwood floors improperly installed or maintained can be easily damaged. Gouges, stains, cracked boards, bounce, noisy flooring can become annoying and unappealing to the eyes and ears. Or sometimes can cause serious injuries. Luckily, you can perform board replacements to fix these issues. Learn how to replace solid, engineered and laminate floor boards.
Repairing solid wood floors: board replacement
How to do a solid hardwood floor repair. Have an unwanted stain, water damage, rotting wood, or damaged floor boards that can cause serious injuries?
Let's repair it...
Here are a few tips and tricks on this wood floor repair process, to help you keep moving along with your flooring job.
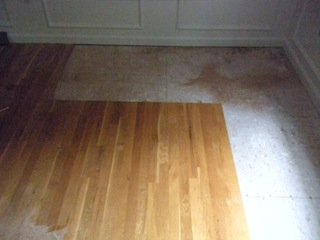
Locate the Problem Area
Analyze the problem area, see which and how many boards need to be replaced. Measure the area, to determine how much flooring is needed for the wood floor repair. Decide which boards need to come out.
Tip: Add an extra 2 feet on the length, when measuring, this will cover your waste for lace-in.
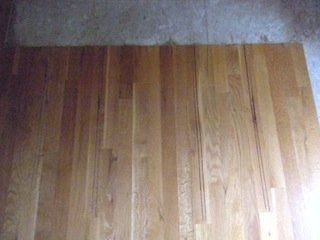
Mark all the boards that will need to be replaced. Choose boards up to 30 inch long, if needed.
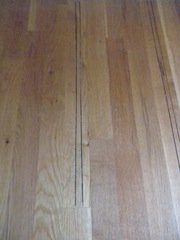
Removing the first piece, using a circular saw, cut 2 slots, 1/2" apart, in the middle of the longest floor board.
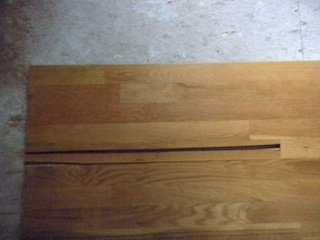
Then remove the center, this will relieve, your flooring board of stress from pressure, from the adjacent boards.
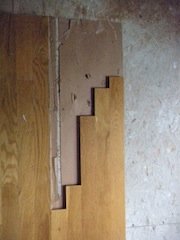
Remove the remaining floor boards. As you remove the adjacent pieces, your floor layout will begin to take shape. The floor boards will start to have a staggered look. The original racking will start to show.
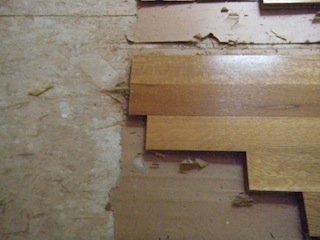
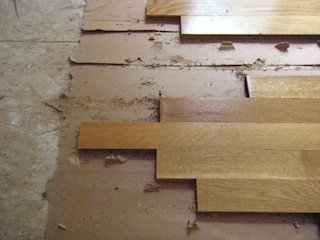
 |
 |
For joints that are very close to each other, using a multi-tool and speed square.Cut the end, so it has proper end staggering distance - 6".
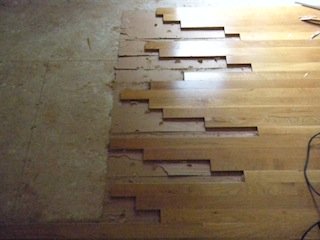
Vacuum and clean the area
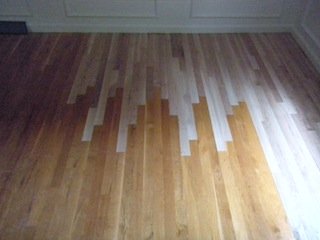
Re-install your hardwood flooring.
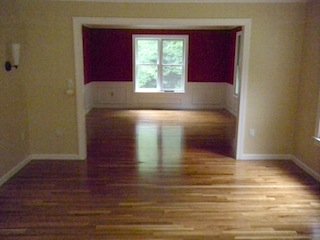
Sand and Finish your hardwood floors.Your flooring should match perfectly, as long as you re-installed the same wood specie. A lot of home owners or installers, will make the common mistake of replacing the floor boards with the wrong wood specie.
Engineered wood floor repair
Does your glue down flooring have a bounce or hollow space underneath? Loose engineered hardwood flooring? Has it gotten to the point where it is problematic and annoying? Make the necessary hardwood floor repair, before it becomes a bigger problem.
The main causes for this problem - subfloor flatness is not within 3/16 over 10' industry standard tolerance, poor quality wood floor mastic or wrong type of flooring mastic. Causing it to sett up too soon and not bonding to the wooden flooring, subfloor was not primed with a bond enhancer glue primer. Fix these problems right away and avoid the domino effect it can create. Here's how to perform an engineered hardwood floor repair.
Determine how big of an area
Determine how big of an area, that needs to repair, by knocking on the wood flooring. Listen to the distinct sound of a hollow knock. Keep knocking until you find a solid thump. Place blue tape at this point. Continue knocking until you have determined the outer boards of the floor repair are. And have the perimeters of the repair taped off.
Remove your flooring
Locate the center of the problem area. And remove the piece at the center. There are a couple of different methods on how to remove the first boards. This would depend on what type of tooling you have access to.
First method: Circular saw and multi-tool
This is the fastest method to remove the first board. Start by using the circular saw set at the proper flooring thickness. Cut 1/2" along the joint lines of the board you will be removing. And then remove the center cut-out of the board, by using a pry-bar or flat screw driver. Use a multi-tool and cut a 45 degree line to each corner of the board. Connecting the corner of the center cut-out to the corner of the flooring board. Then carefully remove the remaining portion of the flooring.
Second Method: Hammer and chisel - the slow way
Using a sharp 1/2 chisel, carefully chisel a channel down the middle of your wood flooring strip. Then chisel each layer off, de-laminating the engineered flooring strip. You will then be able to remove the following loose engineered flooring boards without causing other adjacent boards to become loose, preventing a domino effect.
Scrape and clean
Remove any old adhesive and wood chips by scraping and cleaning from the surface of the sub-floor and under any tongue and groove area of your glue down flooring. If, you have an excessive dip in your sub floor. Perform a subfloor repair by using a portland based skim coat compound application, to fill in the low spot. Follow the manufacturer's instruction on how to properly apply a skim coat .Allow the compound to completely dry, before you continue with your engineered floor repair.
Apply Adhesive
Using a pry bar to lift the wood floorings that are still in tack, about 1/4" up. Apply polyurethane glue under the floor board and in the floor repair area. You can then begin to install your new replacement engineered floor boards.
Note: be sure to use adhesives that is rated for the proper width engineered glue down flooring. Adhesives have different tensile and shear strength ratings for different widths of flooring. Some are rated for planks up to 6 or 7". And others are rated for unlimited widths. Make sure you match the right glue strength to your flooring widths.
Weight it down
Apply weights to the wood floor repair section. Use books, paint cans, weights, tool box, etc. Use anything that will help keep pressure on top of the floor repair area.
Inspect
Check to see if, your engineered hardwood flooring is sitting tight to your sub-floor by simply giving it a knock. You should hear a solid knock, apply more weight, if, you hear a hollow knock.
Allow the adhesive on your floor repair to dry for 24 hours, before removing your weights. And moving your furnitures back.
For minor engineered wood floor repairs
You can purchase a glue down flooring injection repair kit. Real easy to use kit. You will need to drill holes into your floors and then inject adhesive in it. Then plug or fill the drilled holes.
Laminate Floor Repair - How To
Laminate floors are one of the easiest floors to install, but are the worst to repair. If, you have a bounce or hollow space under your Laminate floating floor? Loose laminate wood flooring? Do a wood floor repair, before it becomes a bigger problem.
The main cause for this problem - subfloor flatness not within 3/16" over 10' industry standard tolerance. Fix this problem right away and avoid the domino effect it can create. Here's how to perform a Click and Lock laminate floor repair.
Locate the center of the problem
Determine how big your wood floor repair area is. Find the piece located in the center, then tag it. This is the location where you will need to do a subfloor repair.
Number Your Laminate Flooring
Locate the final row and the last piece that was installed. Place masking tape onto each laminate flooring board starting from the final piece all the way back to the beginning row of the problem area.
Number each piece, to prevent any mix-up when you re-assemble your laminate flooring. If, your laminate flooring is all one length, then your starting and end pieces are the most important pieces to keep in order.
Remove your flooring
Remove your baseboard or shoe molding. Then continue to remove your laminate flooring. Do a reverse installation. Using your pry bar, insert the pry bar under the final row in the middle. Pull it up slightly, then use your hand to push down on the previous row. This will unlock your laminate flooring.
After you have removed the final row. You can now finish removing the rest of the laminate flooring, by using your hands to pull it up. When your complete, remove your underlayment and vacuum the area.
Sub Floor Repair
Use a portland based cement skim coat product. Use Henry 547 universal patch and skim coat compound not self-leveling compound. We want to fill our low spot, not level. Follow manufacturer's instruction on how to mix and apply a skim coat. Allow the skim coat to completely dry, before proceeding. Check skim coat for moisture, before re-installing your laminate wood floors.
Re-Installation of Laminate Flooring
Vacuum and Clean your subfloor, lay back the underlayment then re-install your laminate flooring in the order you have labeled them. Re-install your baseboards or shoe moldings to complete your laminate floor repair.
Inspect
Check to see if your laminate hardwood flooring is sitting tight to your subfloor by simply applying pressure. You should not have more than 1/8" deflection. Which is the equivalent of the thickness your underlayment. For less deflection, upgrade your underlayment to an underlayment that has compressive strength that is 30% or higher, such as cork.
Dealing with flaws - a list of common flaws
Wood floor repair : Wood floor finishes
- Streaks - Lines in the finish. Fix: buff and recoat. Prevent: avoid using dried applicators, applying too thin of a coat, Room and floor temperature too hot.
- Stain bleed back - Stain comes back out of wood pores. Fix: wipe it with dry rag and allow to dry. Prevent: Avoid applying too much stain, wipe away excess stain
- Bubbles - Bubbles in the finish Fix: Buff and recoat. Prevent: Avoid over working the finish, lower the temperature of the room and floor
- Crawling or gator skin - Areas that look likes finish pulled away from contamination Fix: Spot sand and recoat Prevent: difficult to prevent, can occur unsuspectingly.
- Tan lines or discoloration - Discoloration occurs under rugs, covering the floor before curing is complete Fix: Expose area with sunlight, can take up to a year to blend in. Prevent: Allow finish to completely cure before covering it. Control light exposure from windows.
- Early wear - Finish wears immaturely Fix: Sand and apply the finish at the proper coverage Prevent: Sand and finish to industry and manufacturers standards.
- Peeling - Finish just peeling off Fix: resand and recoat Prevent: Use compatible finishes, abrade the finish properly, make sure there is no contaminant present, allow enough time for drying
- Orange Peel - Looks like skin of an orange - Fix: buff and recoat Prevent: Lower the thermometer, eliminate air flow, apply proper coverage, use a T-bar or block applicator
- Beads - Finish settles in the joint, high humidity causes the flooring to expand and squeeze poly beads out from joint. Fix: scrape with plastic putty knife, if, necessary buff and recoat Prevent: Control humidity level in the home. Avoid applying finishes in dry climate
- Side Bonding - Sides of flooring glued together by finish and gapping at the weakest point, showing a large panel Fix: Resand and use sealer that prevents side bonding Prevent: Use a sealer that prevents side bonding
- Uneven Sheen - Uneven shine Fix: buff and recoat Prevent: Stir the finish well before using, room and floor temperature should be between 60-80 degrees
- Wrinkling - Finish show wrinkling in some areas Fix: scrape allow to dry and recoat Prevent: Allow the coatings enough time to dry properly, before applying another coat
Wood floor repair: Installation, sanding and job-site conditions
- Buckling - Floor pulls away from subfloor Fix: remove and repair Prevent: Allow proper expansion gap, control indoor humidity level
- Chatter marks - consistent waves in the floor Fix: Fix sanding equipment, resand on an angle and recoat Prevent: Tune up sanding equipment, make sure floor is solid, sand at slight angle
- Crowning - Middle of the floor board is higher than edge, due to sanding a floor that had cupping immaturely Fix: Resand and recoat Prevent: Allow flooring to completely dry before sanding
- Cupping - High humidity from below, causes the bottom of the floor board to expand and the edges raised Fix: allow to completely dry, sand and coat Prevent: Control indoor humidity or moisture level from below
- Dish out - Oversanding soft grains in floor boards Fix: Re-sand at an angle, use hard plat for finishing passes Prevent: Prevent costly wood floor repair by avoid skipping too many sanding grits, use hard plate system for 80, 100, 120 grits paper
- Abnormal gaps - Larger than usual seasonal gapping Fix: restore relative humidity level to normal living condition 30-50% for the wood floor repair Prevent: Use a humidifier or dehumidifier to maintain humidity level at normal living condition
- Picture Frame - Picture frame effect when staining, due to different sanding patterns Fix: re-sand and re-stain Prevent: Even out the final sanding with a buffer
- Sanding marks - Swirls or lines from sanders Fix: spot sand and recoat Prevent: Finish with finer grit sand paper
- Squeaky/bouncey floor - Noisy or excessive movement in the floor Fix: Inject glue, add fasteners or fix the subfloor Prevent: Proper subfloor prior to hardwood floor installation will help prevent unwanted wood floor repair
- Uneven or wavy floor - High and low spots, Undulation in floor surface Fix: remove flooring and fix subfloor flatness Prevent: prep subfloor to industry standards
Conclusion
Not all installation will be perfect, repairs will be needed, when mishaps occur. So, no need to stress, know that it can be fixed. And if, you are really overwhelmed with the wood floor repair. Contact a NWFA professional for help. Send us an email. Or visit NWFA.org for more information on floor repairs.
Choose an ideal company
You have done all the research and now have the knowledge. Don't choose the wrong flooring company.
Why work with average, when you can work with an ideal hardwood flooring company? Avoid opting for sub-par products, poor workmanship, the lack of industry knowledge and training for the sake of something new.
With G & S Floors, you will experience optimum personal service, with superlative, effective premium quality workmanship in the industry and high quality products. Homes are one of the biggest and most important investments and should be cared by an ideal company.
We've been in business over 19 years. We are a NWFA flooring contractor and follow industry standards and best practice for hardwood flooring installation, sand and finishing. We have access to training and ongoing professional development. We have a well trained staff and we never stop learning. We have a powerful network of talented professionals, distributors, manufactures and experts.
Invest in "Quality" for better service and hardwood flooring that can last a lifetime or centuries!
